Three years ago my mom made HAM on THANKSGIVING and I was outraged! So for Christmas I made my first turkey and decided to name him Henry I, thus intending to get to Henry VIII in 8 years.
Here are the pictures along with things I've learned.
HENRY I:
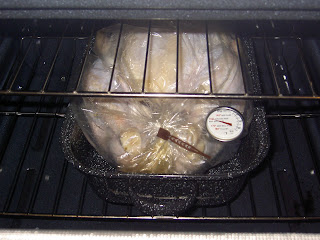
Meat thermometers ROCK...as long as you make sure they are away from the side of the pan. It helps assure hypochondriacs like myself that your meat is in fact cooked thoroughly. Turkey bags are a MUST!

This is my TA-DA moment after successfully cooking my first turkey...it wasn't until Henry was carved that I noticed my eyes were closed...sigh...


HENRY II:
Sadly, this is my only photo of Henry II (that's him in the oven).
HENRY III:
My first two Henrys (as I recall) had their necks covered, so that when I removed them, I didn't see this:


5 comments:
LOVE the Henry II photo!!!
Are you this methodical about cooking all turkeys or just those named Henry?
OK..Ham on Thanksgiving is wrong..shame on your Mom!
I love Henry!
I want to know what is special about the bag.......do tell.
I only cook Henrys!
Turkey bags are special because they keep the turkey really moist and aide with the clean up. No basting required. Just throw the turkey in the bag with some oil (and any additional seasoning you'd like), tie it up, and your Henry will be nice and juicy in about 3 1/2 hours! Basically even those who cannot cook (i.e. me with Henry I & II) can pull this off.
I remember going through the process of naming Henry with you! At least.. I think I remember.. Hmm..
Post a Comment